
microSD incoming inspection checklist for B2B buyers
- Incoming inspection should catch the problems buyers actually see: wrong capacity family, fake capacity, weak sustained write speed, label mismatch and poor lot traceability.
- A quick format or operating-system capacity check is not enough. Sample cards should pass full-address-space write/read verification followed by a full-address error scan.
- Speed markings are minimum-writing-class promises under defined SD conditions, not a guarantee that every host or workload will perform the same way.
- Keep evidence by lot: supplier, purchase order, label photos, CID or serial data when available, test logs, pass/fail rules and the decision owner.
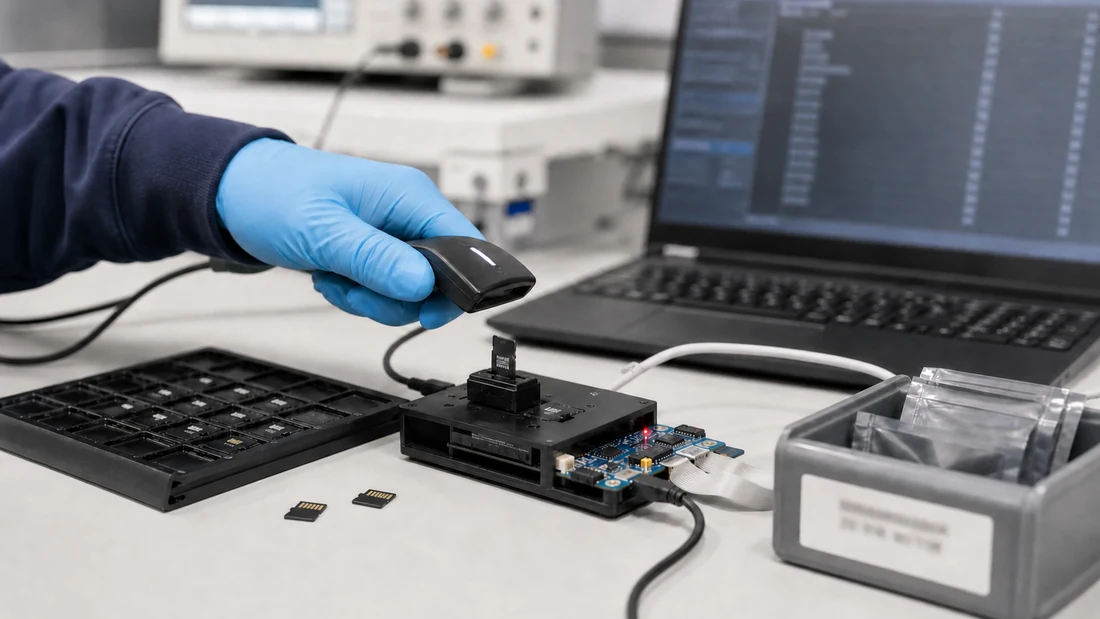
Incoming inspection is not a lab ceremony. It is the point where a reseller, camera brand, dashcam installer or device maker decides whether a shipment can safely reach customers.
For microSD cards, the most expensive failures are ordinary: fake capacity, wrong speed grade, mixed lots, bad packaging, unreadable labels and cards that pass a quick copy test but fail after a continuous recording job. A good checklist catches those issues before they become returns.
This guide is the card-level checklist for resellers and device bundles. For a broader OEM lot-acceptance plan across SSD, USB, eMMC and card products, use the flash-storage incoming inspection plan together with this microSD-specific procedure.
1. Separate the purchase lot before testing
Do not mix samples from different purchase orders, suppliers or delivery dates. Create one record per lot:
- supplier and purchase order;
- claimed brand, model, capacity and speed marks;
- packaging type and label version;
- carton, inner box and card quantity;
- visible lot code, date code or serial range;
- delivery date and receiving person.
Photograph the front and back of the retail package, card label and carton label. If a later complaint appears, those photos often tell you whether the customer received the same lot you approved.
2. Confirm the capacity family
The label capacity should match the SD family expected by your host or customer. SD Association defines SDHC as more than 2 GB through 32 GB with FAT32, SDXC as more than 32 GB through 2 TB with exFAT and SDUC as more than 2 TB through 128 TB with exFAT [1].
For inspection, record:
| Label item | What to check |
|---|---|
| Capacity | Stated GB and operating-system reported bytes/GiB |
| Family | SDHC, SDXC or SDUC where marked |
| Filesystem after official format | FAT32 or exFAT according to the agreed use |
| Host limit | Whether the target camera, recorder or device accepts that family |
A genuine 128 GB card will not show 128 GiB in the operating system. That normal decimal/binary gap is explained in why 128 GB shows about 119 GiB. A fake-capacity card is different: it reports a large size while only a smaller physical memory area works.
3. Verify the speed marks as marks, not marketing
Check that the package and card label agree on the class marks:
- C10, U1 or U3;
- V10, V30, V60 or V90;
- A1 or A2 if app performance is claimed;
- UHS-I, UHS-II or SD Express where relevant.
SD Association defines Speed Class systems to indicate minimum sequential writing performance under standard conditions [2]. Those marks are useful because video recording needs a floor, not only a peak read number. Still, the mark does not prove endurance, temperature range or compatibility with a particular host.
For dashcam and CCTV bundles, match the card to the recorder's bitrate and duty cycle. Our dashcam microSD guide covers the recording-hour and endurance side.
4. Run full write-and-read verification
A quick copy of one file is not enough. Sample cards should be filled across the address range, read back and compared.
Use a consistent tool and keep the log. F3 is an open-source project built to detect fake flash capacity [3]. H2testw is still common on Windows, while F3 works well in many Linux/macOS workflows. The tool matters less than the rule: write enough data to cross the whole usable space, then verify the bytes that come back.
Minimum inspection record:
- tool name and version;
- test host, operating system and card reader;
- card capacity reported before testing;
- write speed and read speed from the verification tool;
- total tested size;
- errors, corrupted bytes or mismatched sectors;
- raw log file or screenshot.
If one sample fails full-capacity verification, quarantine the lot. Do not solve it by formatting the failed sample and shipping the rest.
5. Add a full-address error scan
After destructive full write-and-read verification, run a separate full-address error scan on supported host-visible samples. HD Tune Error Scan or an agreed equivalent can be used for this step; disable Quick Scan so the software examines the full reported address range rather than a reduced sample [4].
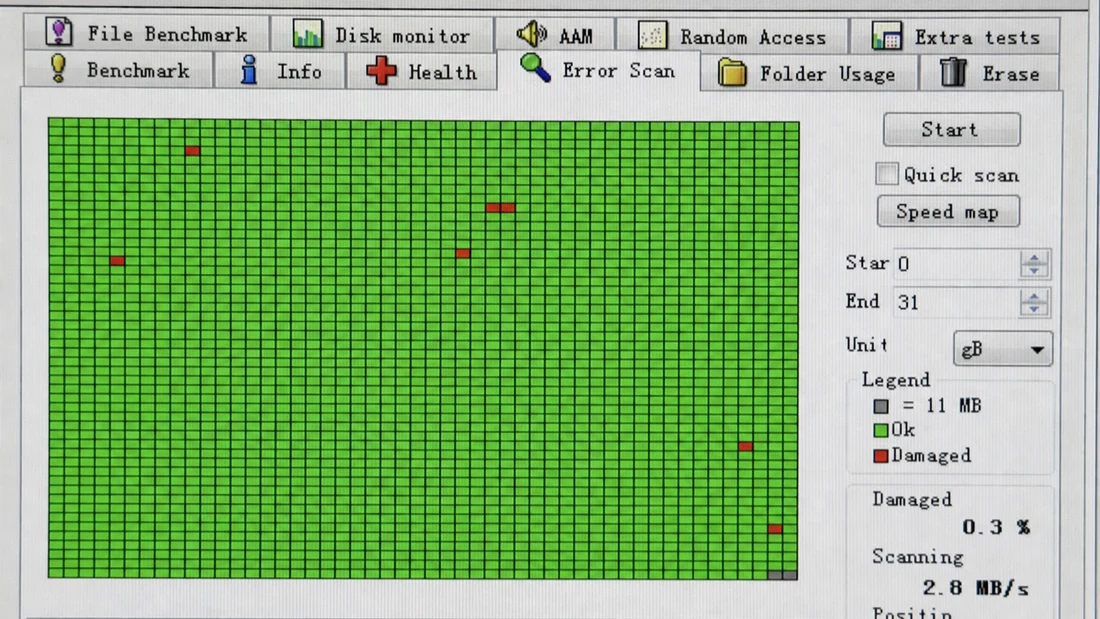
Capture the evidence needed to reproduce the result:
- device identity or serial data and reported capacity;
- test host, operating system, adapter or card reader;
- software name, version and full-scan mode;
- scan start and end time;
- result map and count of damaged or unreadable regions;
- operator, sample ID and lot disposition.
Any red, damaged or unreadable region should trigger quarantine, a controlled retest and supplier review under the acceptance rule written before inspection. Do not treat this scan as a factory NAND bad-block count: it checks host-visible logical addresses, not hidden raw NAND management areas. It is an additional read-error screen and does not replace the full-capacity write-and-read verification in Step 4.
6. Format only after evidence is captured
Use the agreed filesystem for the target use. The SD Association maintains official SD Memory Card Formatter guidance and FAQ material for standard card formatting [5]. For resale lots, formatting should not erase your evidence. Preserve the verification log first, then format according to the customer or device requirement.
For device bundles, record the filesystem, allocation unit if controlled, volume label if used and any preloaded files. For custom preloading, use a separate content loading and verification procedure.
7. Inspect packaging and label consistency
Check for:
- mismatched capacity between package and card;
- inconsistent speed-class icons;
- poor print alignment or unusual fonts;
- missing distributor or compliance text required by your market;
- duplicate serial numbers where unique serials are expected;
- package tampering or resealing;
- mixed label designs inside one lot.
Packaging does not prove flash quality, but it catches many distribution problems. A card can be technically genuine and still unsuitable if the lot cannot be traced or if the package misrepresents the application.
8. Decide the release rule before results arrive
Write the pass/fail rule before inspection:
| Risk level | Typical rule |
|---|---|
| Repeat order, trusted source | Sample inspection plus retained evidence |
| New supplier or new capacity | Larger sample count and full write-verify |
| Private label or device bundle | Functional host test plus write-verify |
| Suspicious source or previous failure | 100% test or reject until supplier explains |
The rule should match business risk. A returned camera card hurts the retailer. A failed card inside a deployed recorder can cost site visits, lost footage and customer trust.
RFQ wording to add
Add this to your microSD RFQ or purchase order:
Supplier must identify the card capacity family, speed-class marks, label revision and lot traceability method. Buyer may perform full-address-space write/read verification on incoming samples. Any capacity error, read/write mismatch, mixed label revision or unexplained lot change is grounds for quarantine and supplier review.
Bottom line
Incoming inspection should not chase every possible lab measurement. It should prove the basics that protect your business: the card is the claimed capacity, it carries the agreed marks, it survives full write/read verification, it matches the target host and it can be traced back to a lot. That is enough to turn a memory-card shipment from a blind buy into a controlled supply decision.
FAQ
Should every microSD card in a shipment be fully tested?
Can a quick format prove a microSD card is genuine?
What should I record after incoming inspection?
References
We publish measured usable capacity and welcome trial-batch verification — automotive-grade, direct from the source factory.